Essential Tools and Materials for Plumbing a Kitchen Sink
Plumbing a kitchen sink requires precise tools and quality materials. How to plumb a kitchen sink?Before starting your project, make sure you have everything you need. Using the correct gear will help ensure a smooth installation process and prevent future issues. Here’s your go-to list.

List of Necessary Tools
To plumb a kitchen sink efficiently, gather these essential tools:
- Adjustable wrenches for tightening and loosening fittings.
- Pipe wrench for gripping and turning pipes.
- Plumber’s putty for creating a water-tight seal.
- Plumber’s tape to prevent leaks on threaded joints.
- A hacksaw to cut through pipes.
- A tubing cutter for precise pipe cuts.
- Screwdrivers for various fasteners.
- A level to ensure proper placement and alignment.
- A flashlight to illuminate dark spaces under the sink.
Each tool plays a role in how to plumb a kitchen sink effectively.
Recommended Materials for a Durable Setup
Choosing the right materials can extend the life of your kitchen sink plumbing:
- PVC or ABS pipes for drain lines.
- Stainless steel or flexible hoses for water supply lines.
- Silicone caulk for a lasting seal around the sink’s edge.
- Compression fittings for secure connections without soldering.
- Brass or copper fittings for durability at critical junctions.
- Pipe insulation to protect against condensation and heat loss.
Selecting premium materials is an investment in the longevity of your kitchen plumbing.
Removing the Old Kitchen Sink: Preparations and Steps
Before installing a new kitchen sink, you must remove the old one. Proper preparations ensure a safe and efficient removal process. Start by clearing the area and gathering your tools.
Preparing the Workspace
Create a clear space to work in by removing any items under the sink. Turn off the water supply to prevent spillage. Put a bucket underneath to catch any residual water. Ensure good lighting to see all the components clearly. Don your safety glasses and gloves to protect against debris and sharp edges.
Step-by-Step Removal Process
- Disconnect the water supply lines using adjustable wrenches. Open the faucet to release any pressure and drain remaining water.
- Remove the P-trap by loosening the slip nuts with a wrench or pliers. Empty water from the P-trap into the bucket.
- Unscrew mounting clips or brackets that hold the sink to the countertop.
- Cut any caulk or sealant between the sink and countertop with a utility knife. Be gentle to avoid damaging the counter.
- Carefully lift the sink out of the countertop. It may require help due to its weight.
- Clean the area where the old sink was to prepare for the new installation.
Following these steps will set the stage for how to plumb a kitchen sink. Next, we’ll look at how to install the new one to ensure a reliable setup.
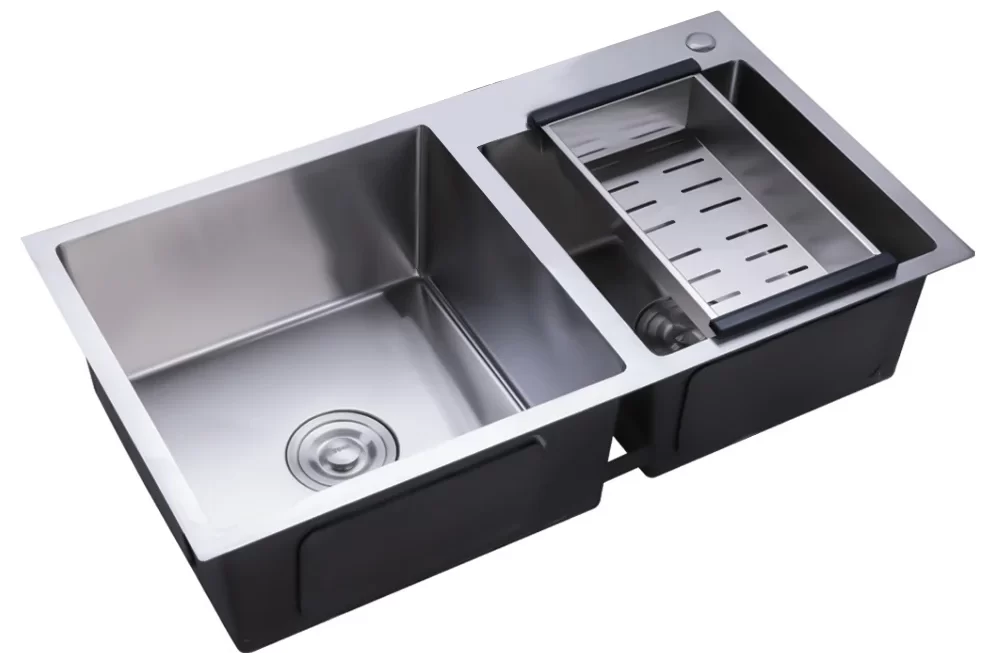
Installing the New Sink: Aligning and Securing
Once you have removed the old sink, it’s time to install the new one. Proper alignment and securing are crucial for the sink’s functionality and to prevent future problems.
Positioning the Sink
Begin by placing the new sink into the opening to check its fit. Adjust it until it’s perfectly centered. Use a level to confirm that the sink sits flat and even on the countertop. If the sink has clips or mounting brackets, align them appropriately now.

Sealing and Fixing the Sink in Place
After positioning the sink, trace its outline on the countertop with a pencil. Remove the sink and apply a bead of silicone caulk along the traced line. This creates a watertight seal. Carefully lower the sink back into place, pressing down firmly to set it in the caulk. Attach any clips or brackets to secure the sink to the countertop. Tighten these fasteners with a screwdriver but avoid over-tightening. Wipe away any excess caulk with a damp cloth before it dries. Allow the caulk to cure as per the manufacturer’s instructions before continuing with the plumbing.
Through correct positioning and sealing, you ensure the new sink is set for the next steps on how to plumb a kitchen sink.
Plumbing the Drain: Pipes and P-Trap Installation
To plumb a kitchen sink effectively, attention to the drain assembly is critical. This includes connecting the drain pipes and installing the P-trap accurately. These components form the backbone of your sink’s drainage system. They keep it working well and prevent odors from coming back up through the pipes.
Assembling the Drain Pipes
Begin by measuring the distance from the bottom of the sink to the drain line in the wall or floor. Cut your PVC or ABS pipes to match this length using a tubing cutter. Ensure clean, burr-free cuts for a tight fit. Connect the tailpiece to the sink drain and secure it with a slip nut and washer. Align all the pipes before tightening to avoid misplacement and leaks.
Remember, the slope of the horizontal drain pipe needs a quarter-inch of fall per foot. This allows water to flow smoothly. Adjust the pipe heights and depths accordingly before tightening the connections. Use plumber’s tape on all threaded joints for a leak-free seal. The goal is to create a path that guides wastewater without obstacles.
P-Trap Configuration and Installation
The P-trap is a curve in the drain line that holds water, creating a seal to stop sewer gases. Assemble the P-trap elements loosely to gauge fit and alignment. Make sure the curved section aligns with the tailpiece and the drain line. Once aligned, tighten all nuts by hand first, then snug them up with a wrench. Don’t over-tighten to prevent cracking the plastic.
Ensure the P-trap is level and that it maintains the necessary water seal. A good rule of thumb is to have at least two inches of water in the curve. Your sink is now ready to handle the disposal of used water effectively. Proper installation of the drain pipes and P-trap contributes to efficient sink use and minimizes plumbing woes.
Connecting the Water Supply Lines
Once the drain pipes and P-trap are in place, it’s time to focus on the water supply lines. These lines ensure your kitchen sink gets hot and cold water on demand. It’s vital to make secure connections to prevent leaks and ensure seamless operation.
Hot and Cold Water Connections
Start by identifying the hot and cold water supply valves under your sink. Usually, the hot water valve is on the left and the cold on the right. Attach flexible supply hoses to these valves. Make sure you match the hot water supply line to the hot water faucet and the same for cold. Use adjustable wrenches to tighten the connections without stripping the threads. Tight and snug fittings are key for a successful setup.
Tips for Leak-Proof Water Supply Links
Achieving a leak-proof connection requires attention to detail:
- Before attaching the hoses, wrap plumber’s tape clockwise around the valve threads. This helps seal the connection.
- While tightening the nuts, hold the valve with one wrench and turn the nut with another. This avoids putting too much pressure on the pipes.
- After securing the hoses to the valves, attach the other ends to the faucet’s corresponding hot and cold stems. Use the same tightening technique.
- Check all the connections by running your fingers around them to feel for moisture.
By following these steps, you can plumb a kitchen sink’s water supply lines with confidence and a higher assurance against leaks.
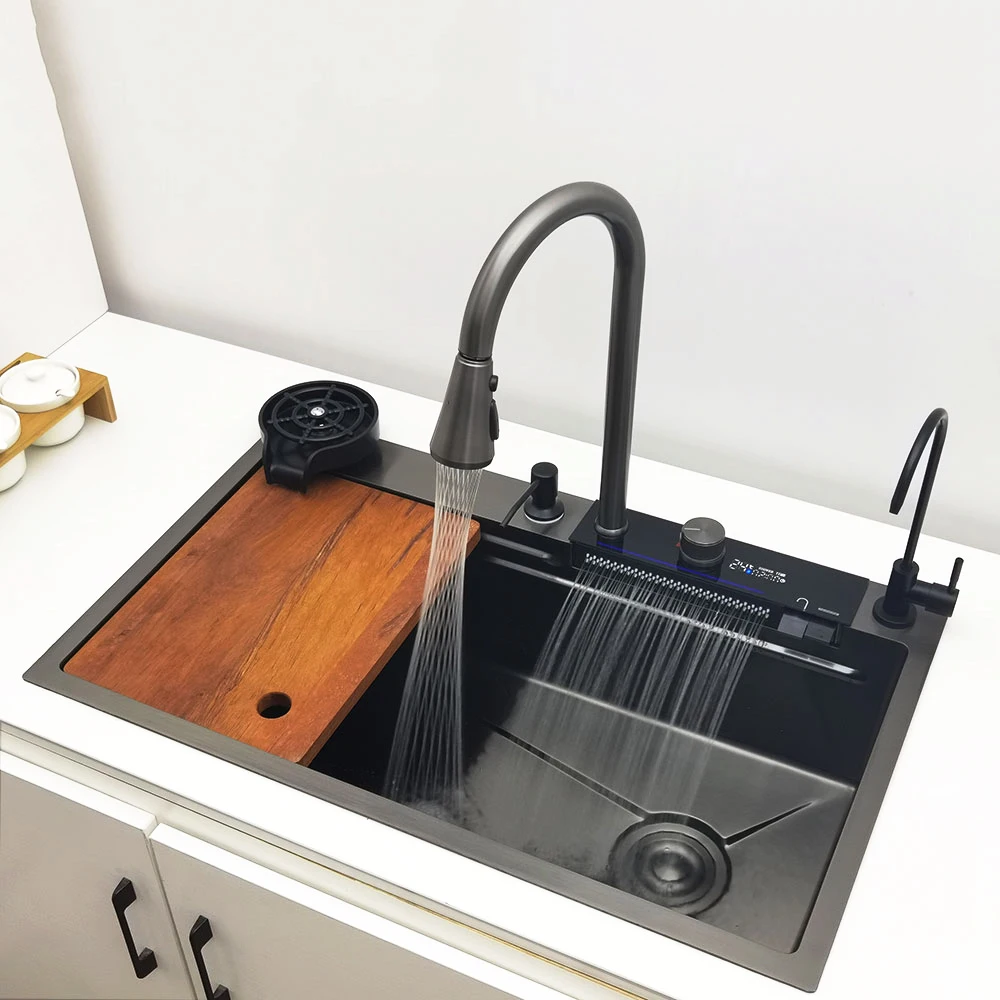
Attaching and Setting Up the Faucet
Installing a faucet is pivotal for how to plumb a kitchen sink.
Faucet Installation Guide
Begin with the faucet parts laid out and the manual at hand. Insert the faucet gasket over the base plate and feed the faucet lines through the sink holes. From below, screw on the mounting nuts. Ensure everything aligns straight. Tighten the nuts securely, but don’t strip them. Attach any provided weight to the pull-down faucet hose if applicable.
Connecting Faucet to Water Supply
Now, connect the faucet lines to their respective water supply valves. Remember, hot to hot and cold to cold. Use plumber’s tape on threads for a good seal. Tighten the connections well. Check by pulling the faucet lever to see if hot and cold are rightly corresponded. No drips below means you’ve nailed it.
Through these installation steps, your kitchen sink is nearly plumbing-perfect. The last stage involves final checks and leak testing, ensuring everything holds up under daily use.
Final Checks and Leak Testing
Before calling your plumbing project complete, it’s critical to run final checks and perform a leak test. This ensures that all connections are secure and the system is functioning as intended.
Inspecting Connections
Start by carefully examining every connection you’ve made. This includes checking the supply line fittings, the drain pipes, and the P-trap assembly. Look for any signs of moisture or small drips that may indicate a leak. If you find a leak, tighten the connection slightly more, but be careful not to over-tighten and damage the materials. Make sure the faucet operates smoothly, and the handles turn without resistance.
Performing a Leak Test
After inspecting the connections, conduct a leak test. Turn on the water supply and let both the hot and cold water run for a few minutes. Watch for any drips or water pooling under the sink. Place a piece of dry paper towel under each connection to help spot any leaks.
As you let the water run, check the flow from the faucet spout. A steady stream without sputtering indicates a properly installed aerator. Lastly, fill the sink with water, then drain it while inspecting the P-trap and drain lines for leaks. Any issues found should be addressed immediately to avoid water damage.
With these final steps, your how to plumb a kitchen sink guide is complete. Consistent attention to detail will ensure a functioning kitchen sink that stands the test of time.
Maintenance Tips for Kitchen Sink Plumbing
Maintaining your kitchen sink plumbing is key to avoiding costly repairs. Follow these simple practices regularly for a well-running system.
Routine Upkeep Practices
To keep your plumbing in top shape, try these tips:
- Inspect pipes and joints for leaks or corrosion each month.
- Clear the drains by flushing with hot water weekly.
- Use strainers to catch food scraps and prevent clogs.
- Avoid harsh chemicals that damage pipes and seals.
- Replace worn washers and gaskets promptly to stop drips.
Consistent maintenance can prolong your plumbing’s life and efficiency.
When to Seek Professional Help
Some problems need a professional’s touch. Reach out for help if you notice:
- Persistent drips or leaks you can’t fix.
- Slow-draining sinks despite clear pipes.
- Water damage or mold under the sink.
- Unusual noises or smells from drains.
An expert plumber can diagnose and solve complex issues, ensuring your kitchen sink functions properly.